The Protolabs Network Standard
Quality Control Procedures
The following procedures are followed when inspecting injection molded parts, during the injection molding process and after full production.
In-process Quality Control procedures
This in-process Quality Control is done for the first samples and for every new mold used. All the defects are marked in our Injection Molding Defect Book.
Visual appearance
Five pieces are checked for visual appearance during production. No obvious welding lines, burning marks, flow marks or scratches must be visible. Parts should be clean and free of plastic residues.
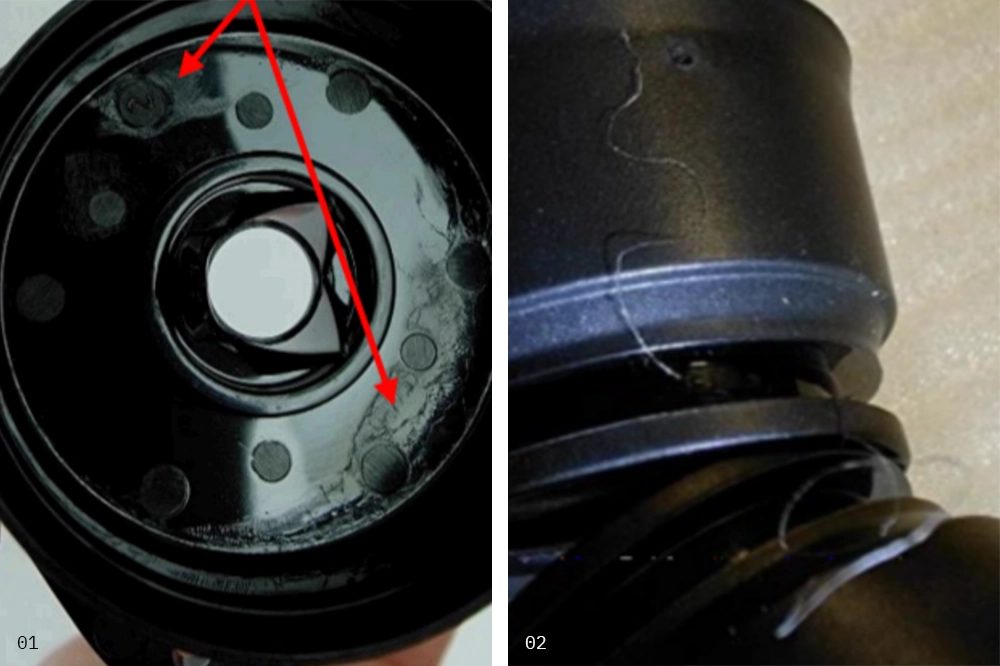
Examples of non-acceptable visual defects:

The color of the part must be as close as possible to the provided Pantone or RAL color.
The color of the first samples is compared to a color book reference (Pantone or RAL). If it is a satisfactory match then the parts are kept as a reference for the rest of the production.
Dimensions
Three pieces are checked for dimension accuracy during production. Dimensions are measured with a digital calliper.
Standard tolerances are specified above. If a tolerance is non-standard and indicated in the technical drawing or DfM then it prevails the standard one.
Weight
One piece is weighted using an electronic scale during production.
Sampling
Samples are prepared for each order. At least 5 parts from each mold cavity are sent to Protolabs Network for control, unless specified in the Purchase Order.
Outgoing inspection standards
This section defines how parts need to be inspected after the full production is finished. Parts are inspected with spot check inspection and according to ISO 2859-1.
Visual appearance
Each inspected part needs to be free of any defect detailed in the following table to pass the QC process.
|
Defect or non-conformance |
Details on how to check it |
|---|---|
|
Short moulding |
Does the part show any local short-shot or sink mark? |
|
Rough edges |
Does the part have any rough edges? |
|
Scratch |
Does the part have any scratches? |
|
Flashes |
Are there any significant flashes on the part? |
|
Burning marks |
Is there any discolouration or dark reddish brown streaks on the part? |
|
Flow marks |
Is there any visible flow mark on the part? |
|
Silver streaks |
Is there any white streak on the part? |
|
Colour difference |
Does the part has a significant colour deviation? |
|
Oil pollution |
Does the part have any oil pollution? Is it sticky or oily to the touch? |
|
Bubbles |
Is there any vacuum bubble formed inside the wall of the part? |
|
Color stain |
Does the part show any black dot, white dot or mixed colour dot? |
|
Distortion |
Is the shape of the part distorted, warped, curved, etc? |
|
Dimensions and design |
Does the part show a difference with the 3D model? |
|
Plastic residues |
Does the part have any residue or plastic scrapings? |
Dimensions and tolerances
All parts from the sample set need to pass the dimension check, according to the technical drawing, 3D model or standard tolerances specified above.
A digital calliper is used for the measurements.
Total quantity of parts
The total quantity of parts needs to be equal or superior to the number of parts indicated in the Purchase Order.
Best practices are used to evaluate the total quantity of each part in an order.


